If at any time you experience unusual pain or discomfort or dizziness, please STOP all exercises and contact Dr. Carmack immediately.
The intended order of homecare exercises:
- Spinal Warm-ups
- Isometrics
- Cervical
- Thoracic
- Lumbar/Pelvic
- Body weighting
- Passive Molding
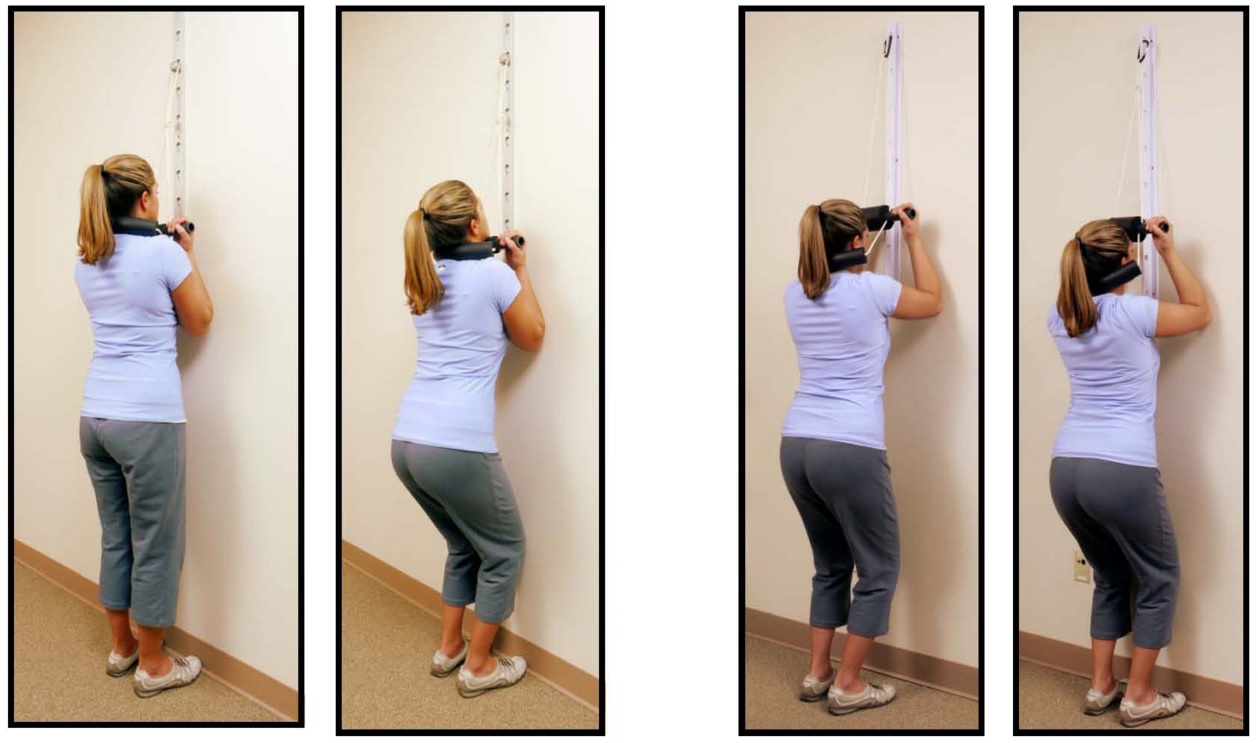
Cervical Traction
- Do slight pulls so you can feel the stretch in the neck.
- Do not overexert.
- Do not stand on any object while performing this exercise.
- Adjust the height so the curved piece hangs slightly lower than the back of the head. The straight piece should be under the chin when it’s free-hanging.
- Place your elbows and knees against the door with feet shoulder-width apart.
- Place the large curved piece behind the neck and the smaller straight piece under the chin.
- Alternate placement for the chin bar for those with TMJ issues is to place it on the forehead.
- Hold both handles firmly with palms facing toward your face while bending the knees into a squat movement like you’re about to sit in a chair behind you.
- Make sure to breathe with each repetition.
- Begin with 10 repetitions and work up to 100 repetitions or as your doctor recommends.
- Initial use may result in discomfort, which can be controlled through the use of ice for up to 20 minutes directly after performing standing cervical traction.
 |
 |
| Regular | Modified |
- Complete 50 of each exercise or as recommended by your doctor:
- Regular
- Side to side
- Move ear toward shoulder while lifting the hip on the same side like you’re making the letter “C”
- Side to side


- Front to back
- Tuck chin to chest and curl body into a ball.
- Leading with your head, look up toward the ceiling, put shoulders back and arm the lower back like you’re trying to push your abdomen forward.


- Rotation
- Turn upper body to one side and look as far as you comfortably can over the shoulder of the same side. Then rotate to other side.


- Modified (pelvic circles, figure 8)
- Sit on the wobble cushion and do circles in one direction, then opposite direction or make a “Figure 8” with your pelvis.
CERVICAL
Alar Ligament Exercise
Try to turn your head into your arm, but use your arm to prevent your head from actually moving.
 |
 |
| Right | Left |
With your head in neutral over the shoulders and looking straight ahead, bring both arms up to your head with the palms placed over your eyebrows. Try to push your head forward into your hands with your hands resisting. Make sure to only use your front neck muscles and do NOT extend your chin.
 |
 |
| Front View | Side View |
Interlock your fingers and place your hands cupping the base of your skull. Pull slightly with arms and use neck muscles to hold your head while looking up.

Place the palm of your hand over your ear with your elbow straight out to the side. Push your head into your hand without moving your head.
 |
 |
| Right | Left |
Use your traction unit with the curved piece around the back of the neck and your hands on the handles of the chin bar. With the arms pulling away from you, move your head back into the curved piece by tucking your chin in like you’re trying to give yourself a double-chin. Make sure your eyes remain level looking straight in front of you and not up toward the ceiling.
 |
 |
| 30 Degrees Down | Straight |
Chest Expander
Push your hands together while opening up chest and bringing shoulders down and back. Hold for 60 seconds or as recommended by your doctor.

While keeping your hands and elbows together, raise your arms up as far as you can. Your eyes should be looking up at your hands. Hold for 60 seconds or as recommended by your doctor.

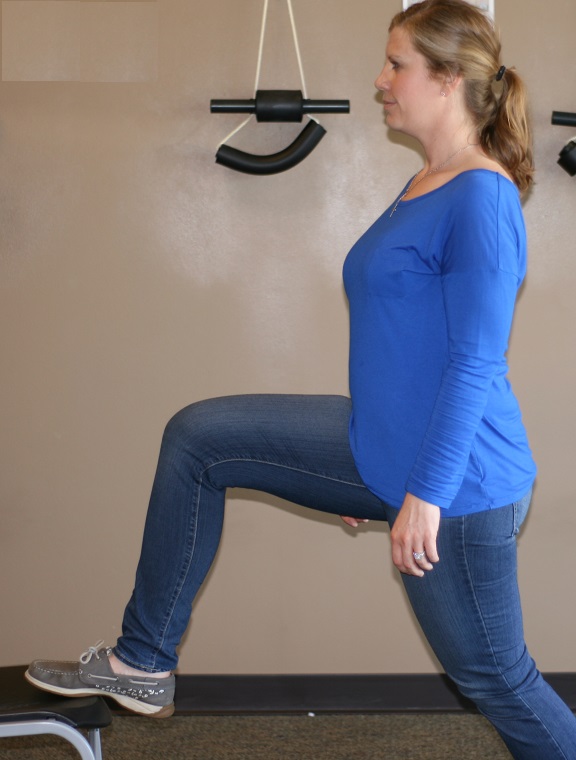
Psoas Stretch
Place one leg forward or on an elevated surface and lean the torso forward while not bending at the waist. You will feel the stretch in the front of the hip of the leg that is further back.
 |
 |
| Left | Right |
Place the resistance band around the leg to be lift and under the middle of the foot of the opposite side to help hold in place. Lift the knee up and away from the body and hold for recommended time, then relax.
 |
 |
| Left | Right |
Lumbar Extension
With your hands holding your knees, push your stomach out to force a curve into the lower back. You should feel the stretch in the lower back.

Headweights
Please follow the prescribed configuration for best results.
Make sure you are always looking straight forward with weight on your head.
March in place or walk around for best results with body weighting.


Spinal Molding Rolls
Lie on spinal molding rolls as prescribed by your doctor.

Apex Cervical Orthotic
To prevent hyperextension, fit the device by removing one or both lower portions of the device as recommended by the doctor. To remove, slide a sharp blade along the inside edge of the precut areas.
The larger angled surface should face the shoulders.
The Apex should be used daily, with increasing time intervals. The Apex should be used for an initial treatment of 2 minutes. Increase each daily treatment in 1 minute intervals, with a maximum treatment time of 20 minutes.
To get off the device, roll off of the Apex before sitting up. Some soreness or stiffness is normal. Apply ice to the affected area for 15 minutes after each treatment as needed.

